Barrie Home Inspector

Home Maintenance and Tips for Home Owners

Month: October 2011

Barrie WETT Inspection

Barrie WETT Inspection. Most people love the idea of having a natural wood burning fireplace in their home, but they sometimes do not realize all of the responsibilities that come with it. Fireplaces do take a bit of care to ensure that they do not cause any problems. Just one little issue with a fireplace could result in your house catching fire, so having a regular WETT inspection by a trained professional is very important. WETT inspections are performed for a variety of reasons, including insurance company requests, code compliance, and inspection after and overheat or chimney fire.

Most Insurance Company’s require a WETT Inspection anytime a Wood Burning appliance is installed or when buying a new home. There are strict requirements that affect clearances that many older stoves and fireplaces will not meet.

There are several things inspectors will look at when they perform a WETT inspection. Unsafe Chimney & Flue Items such as the chimney, the liner, the smoke chamber, damper, firebox and other working parts inside the fireplace or woodstove to make sure that they are working properly. The inspector will also make sure clearances to combustible materials are sufficient so you can use your wood burning appliance safely.

Complete inspection of any wood burning appliance involves an evaluation of every part of the heating system, from the floor pad to the chimney cap. All of these parts are covered in the codes, so compliance can only be determined if every part is inspected.

The chimney is usually the most difficult part of the system to inspect properly. Flue liners are subject to cracking inside masonry chimneys, or buckling and corrosion in the case of metal chimneys. It is difficult to inspect a chimney liner unless it has just been cleaned.

Inspectors only become certified after at least 80 weeks of work in the field and require a WETT Certified Certificateletter of reference. WETT Certified Inspectors must take and pass a two day Code Compliant course with a passing grade of 70 percent. WETT Inspectors then have the choice of becoming a certified tech or advisor, earn their certification in chimney sweeping, or earn a WETT certification in SITE basic.

In many cases, insurance companies will require you to have your units WETT certified, although this is a bit of a technical problem because of how the process works. WETT inspectors do not certify appliances, although they do provide certified inspections for the insurance company to show that all parts of the fireplace are in good working order.

The Barrie WETT Inspector will include a WETT Inspection of one appliance for $50.00 when included as part of Home Inspection package.  We also provide Alliston WETT Inspection services to the Town of Alliston and New Tecumseth.   We have been WETT Certified for over 10 years and have a wealth of knowledge concerning Wood Stoves, Pellet Stoves and Fireplaces.

WETT Inspections for Barrie, Alliston and Orillia

WETT Inspections for Barrie, Alliston and Orillia.  The Barrie Home Inspector provides WETT Inspection services to Barrie, Alliston, Orillia, Stayner, Innisfil, Thornton, Rama, Lefroy, Alcona Beach, Bradford, Newmarket, Churchill, Tiny Beaches, Midland, Penetanguishene, Penetang, Wasaga Beach, Everett, Tottenham, Beeton and Simcoe County.

WETT (Wood Energy Technology Transfer)
SITE (System Inspections and Technical Evaluation)

SITE is a set of standardized guidelines recommended by WETT for the inspection and evaluation of wood-burning and other solid fuel burning systems. This chart identifies what each inspection level includes, its purpose and process. An inspection at any level
may include more but not less than that outlined in the “SITE Chart and Guidelines”.

To find out more valuable information on WETT Inspections visit  WETT INSPECTON’S for all the information you will need when installing a wood stove, fireplace or pellet stove

Level 1 Inspection “Readily Accessible” Level 2 Inspection “Accessible” Level 3 Inspection “Concealed Accessibility”
Scope (What is Included) The inspection of “readily accessible” components of: (1) A wood/solid-fuel burning appliance, or (2) A site-built fireplace, and (3) The venting system for:

a)The proper use of required components, and

b)clearance to combustibles, and

c)readily visible system obstructions or deposits.


(1)A Level 1 inspection, and (2)an inspection of all “accessible” components of the system for clearance to combustibles and for obstructions or deposits, and (3)an evaluation of the construction, sizing, condition and suitability of “accessible” components of the system.   1)A Level 1 and 2 inspection, and (2)an inspection of system components in areas of “concealed accessibility” for clearance to combustibles, and (3)an evaluation of construction, sizing, condition and suitability of components of the system in areas of “concealed accessibility”, and (4)an examination of surrounding construction for evidence of damage.


Purpose (Why and When) (1) To verify code compliance of the readily accessible components: (a)At a homeowner’s request, or (b)with a homeowner’s permission, when requested by a third party such as a Realtor, insurance company, home buyer or seller etc.   1)When a Level 1 inspection is deemed insufficient because of a detected or suspected compliance issue or hazard, or (2)when verification of the suitability and integrity of the system components is required, or (3)after an operating malfunction or external event that may have caused damage to the system, or (4)if the system experiences combustion spillage events, or

(5)when an appliance is replaced, or

(6)when a major system component is replaced or requires significant repair.


(1)When a Level 2 inspection is deemed insufficient because of a detected or suspected compliance issue or hazard that cannot be fully verified without access to concealed areas, or (2)after an incident that may have caused damage to any concealed parts of the system or building construction related to the system.
Process (What to Expect) 1)A basic visual inspection by a WETT certified SITE inspector; performed without a ladder or specialized tools. (2)A report using WETT’s recommended inspection checklist(s) or similar checklist(s), for the type of system being inspected. (1)Inspection of accessible system components, which may include disassembly of accessible system components, by a WETT certified SITE Comprehensive Inspector, or by a WETT certified Technician, as a part
of an installation or major system component repair process.
(2)A report using WETT’s recommended checklist(s), or similar checklist(s). (3)A written evaluation of the suitability and integrity of the system  
(1)The inspection by invasive means of concealed areas of the system by a WETT certified SITE Comprehensive Inspector, including the removal of nonstructural building components and/or the disassembly of parts of the system. (2)The possible use of specialized tools and equipment. (3)A comprehensive written report of the findings and possibly including inspection checklists.  
Wood Energy Technology Transfer Inc. (WETT Inc.) is a non-profit training and education association. Through professional training and public education, WETT Inc. promotes the safe and effective use of wood and solid-fuel burning systems in Canada. SITE and WETT Inc. are registered trademarks of WETT Inc. 

Avoid Water Leaks on New Window Installations

Avoid Water Leaks on New Window Installations. Avoiding leaks when installing vinyl retrofit windows is simple with a little expertise and common sense.

These days a lot of homeowners are replacing their old windows with vinyl windows using the retrofit style of window frame. This is particularly true in the west, and specifically, in California. The number one argument that I have heard against using the retrofit method, is that it is susceptible to water leaks. Well, that’s true if you don’t do it properly. But, if you do a complete tear out of your old window down to the studs, you’re going to have water leak issues there as well if you don’t install the new window properly. So I think that argument is, well, all wet. So, let me tell you the best way to install your retrofit windows that will ensure that water cannot get in.

There is an old song that goes, “It never rains in California, but girl don’t they warn ya, it pours, man it pours”. For those of you in California, you know how true this is. While California doesn’t get a lot of annual rainfall, when it does rain, it can come down in buckets due to the close proximity to the ocean. So, you want to be sure that your windows are well sealed. If you are installing retrofit frames against a stucco house, you want to put a thick bead of sealant right on the outside face of the old window frame, all the way around. Latex caulk should work fine, but if you want to spend a little more to get the best sealant available, use 100% silicone. Depending on the number of windows you will be doing, this extra cost can add up. You pay approximately for a tube of acrylic latex caulk, and or more for a tube of 100% silicone. You are going to use 1-3 tubes per window, depending on the size. So you can see how it could add up. Here is a trick that I used to do to save a little money; The most vulnerable part of your installation is the top of the window, because gravity will have the water running down from the roof to the ground. It’s not likely that water is going to find it’s way through the sides or bottom. So, I used to carry two caulking guns, and load one with the silicone, and the other with the acrylic caulk. I would run the silicone accross the top of the old frame, and caulk the sides and bottom. Then, put your new window into the opening and have a helper hold it firmly in place while you plumb and level it, then screw it into place. After you have the window completely installed, your final step should be to caulk where the retrofit lip meets the stucco. Here again, I used to use white silicone on the top, and caulk on the sides and bottom. You now have a double barrier against water infiltration. After about a week, check the sealant around each window for signs of cracking. Because stucco is usually uneven, there could have been gaps that were larger in some areas than in others. If you don’t force the caulk into the gap to completely fill it, the caulk can sag before drying, causing a crack to form. Simply recaulk over any cracks that you see. You can check the silicone on top as well, but because silicone dries like a rubber substance, you shouldn’t see any cracks there.

OK, what if the replacement windows are going between wood trim surrounding the opening? If you are using the retrofit lip, and trimming it to fit between the wood, then you still apply the heavy bead to the old frame before installing the window. But, instead of sealing where the retrofit lip meets the stucco, you seal where it meets the wood. Then, you want to be sure to seal above the window, where the top piece of wood meets the stucco. Again, use silicone up there. Now, no water can run down the stucco wall and get under the top piece of wood. Sometimes, though, you might decide not to use a retrofit style frame between the wood, choosing a block replacement frame instead. If you choose to do it this way, you have to add trim to the outside. You still want to apply the sealant to the old frame, then apply your trim so it contacts the new window as well as the sealant on the old frame.

If you follow these procedures, you won’t have to worry about any water penetrating into your home, I don’t care how hard it pours!

Chimney Fires

Chimney Fires. If a chimney fire does occur, immediately shut off the air supply by closing all dampers and air openings on the stove or glass doors of the fireplace. If the fire in the stove or fireplace can be extinguished safely, put it out as quickly and safely as possible. A dry chemical fire extinguisher works well in putting out a wood fire. Never throw water on a stove fire as it could cause a large burst of steam and also possible burns. When working around a wood stove or fireplace a good pair of fireproof gloves are a must.

Chimney fires are often dramatic events, with flames and cinders leaping high enough to come to the attention of neighbors and passersby. But they’re not all like this. They can also burn quite slowly if they aren’t being fed by much air or fuel. These sleeper fires are no less dangerous than the more visibly dramatic ones. They still reach high temperatures and can damage the chimney and nearby combustible parts of the house. The heat can be so intense that it can actually pick the mortar out from between bricks or stones.

A chimney fire can catch your roof or any walls near the chimney on fire. Once fire has occurred in a chimney the entire chimney is usually replaced due to cracked flue tiles. Clay flue tiles are designed to vent the gases and not contain a hot fire which is what occurs when there is a chimney fire.

One cause of chimney fires is debris in the chimney. If birds drop in nesting material or the like, the hot products of combustion can cause the nesting material to catch on fire, resulting in a fire in the flue system. In order to prevent chimney fires from being caused in this manner, it is important to have a cap at the top of your chimney. A stainless steel chimney cap will not allow birds or bats to enter the chimney at all due to small wire mesh. A chimney cap saves the lives of animals and also prevents chimney fires.

A chimney fire extinguisher looks like a flare. The most popular extinguisher is called Chimfex. It essentially extinguishes the fire by using up all of the oxygen in the chimney. If you do have a chimney fire, you should strike the Chimfex flare and throw it into the firebox. If you are using a fireplace with glass doors, be sure to shut the doors as that will help to cut off the oxygen supply.

Leaves, birdnests or debris from your gas or oil heating system can block your chimney. A crack or break in the flue tile to can interfere with the chimney’s ability to vent properly. If your chimney is blocked or is not airtight, Carbon Monoxide may seep into your home unnoticed. Symptoms of carbon monoxide poisoning are similar to those of the flu: headaches, fatigue and nausea. If undetected, this odorless, colorless gas can be fatal.

Have your chimney inspected by a WETT Certified Professional who is trained to check for problems before a chimney fire happens to you. WETT Inspectors or Licensed Chimney sweeps will inspect and report on the condition of your chimney. You should have your chimney cleaned every year to help prevent the buildup of harmful creosote and also to check for any cracked or damaged flue tiles. The Barrie WETT Inspection Service provides this service to Simcoe County and area.

Pellet Stove Installation Requirements

Pellet Stove Installation Requirements. Until the 1990s, stoves were not tested for safety, and homeowners had little or no guidance on installation. The result was house fires that were avoidable. Today, after years of co-operative efforts by all levels of government, the wood-heating industry and groups such as Fire Prevention Canada, several measures are
in place to help you heat with wood – safely. These safety measures include the following:
• a reliable installation code (“CSA B365 Installation Code for Solid-Fuel-Burning Appliances and Equipment”);
• safety-testing standards for stoves, inserts, fireplaces, furnaces, chimneys and flue pipes (almost all equipment for sale carries a certification label indicating that it conforms to safety tests); and a thorough training program for retailers, installers, chimney sweeps, municipal fire and building inspectors, and insurance inspectors (professionals in every part of Canada have completed the WETT or APC programs).

When installing a Pellet Stove the termination of a sidewall vent serving a pellet-burning appliance shall be located to avoid personal burn injury, fire hazard, and interference with or damage to adjacent properties. A vent shall not terminate less than 2.1 m above any public sidewalk, lane or street or right of way. It shall not be within 1.8 m of a mechanical air supply inlet to a building. The vent shall not be within 1 m of a building opening or air inlet or another appliance or within 1 meter of the center line of an exterior gas meter. The vent shall not be within 1.8 m of any gas service regulator vent outlet or within 1 m of an oil tank vent or an oil tank inlet. The vent must also be located not less than 0.3 m above grade level or any surface that may support snow, ice, or debris or be located under a veranda, porch or deck.

A clear space of at least 1 m shall be provided from the termination to any building projection, adjacent wall, or any combustible materials such as trees, shrubs, fencing, etc. Guards shall be provided around the termination of the sidewall venting system to prevent individuals from accidentally running into the venting system and mechanical damage from occurring as a result of vehicular traffic. Where termination is above the roof line, the vent shall terminate at least 1 m above the adjacent roof surface.

Every automatic fuel-feeding device servicing a steam boiler using solid fuel shall be equipped with the following controls; a clearly labeled device, located near each entrance to the automatic feeding device floor space and capable of manual operation, for the stopping the supply of fuel to the fire grate; and an automatic device for stopping the automatic feeder if there is a low water level, press exceeds the maximum, shutdown or failure of the combustion air fan; shutdown or failure of the mechanical flue-gas exhauster; a device for maintaining minimum fire and at least one automatic control to regulate or control the normal operation of automatic fuel-feeding device.

Every automatic fuel-feeding device serving a forced-air furnace using solid fuel shall be equipped with the following controls: A clearly labeled device, located near each entrance to the automatic fuel-feeding device floor space and capable or manual operation, for stopping the supply of fuel to the fire grate. This device shall be capable of stopping the fuel-feeding if the temperature exceeds 95 deg C in the furnace supply plenum; shut down or failure of combustion air; failure of the combustion air supply mechanism to stay in the fully open position; shut down due to mechanical failure or failure of the flue-gas flow. The automatic fuel-feeding device shall have a control that will maintain a minimum fire and one automatic control to regulate the fuel-feeding device under normal operation.

When installed and used correctly, certified clean-burning appliances significantly reduce the risk of chimney fires. Their advanced combustion systems burn the smoke inside the firebox, so less creosote forms in the chimney. As a bonus, you save on chimney-cleaning costs, which can be significant for conventional systems that need cleaning two or three times each heating season.

DUAL PANE WINDOW GLASS REPAIR

DUAL PANE WINDOW GLASS REPAIR. For the past few weeks, I have been explaining how to repair a broken window pane in your home. But, what if you have dual pane windows? Is the process the same? Well, pretty much, except for a couple of variations. So, let’s review the single pane repair process, and I will point out the differences regarding dual pane windows.

When we start talking about dual pane windows, one of the first things that comes to mind is vinyl window frames instead of aluminum. When dealing with dual pane windows, you can have either aluminum or vinyl frames, depending on the year the house was built. Dual pane glass got popular in the 1980′s, but vinyl frames didn’t really catch on until the 1990′s. So, if your house is less than 10 years old, chances are you have vinyl framed windows. In either case, I will discuss the differences. Let’s say you have a sliding aluminum frame window with dual pane glass. The procedure for removing the frame from the opening and the glass from the sash is the same as with the single pane windows. The differences are, first, the glass goes into the frame about twice as far as the single pane window. The single pane window glass went 1/4″ into the surrounding rubber. The dual pane usually goes 1/2″ into the rubber. So, if both pieces of glass have been broken, you are going to have to order a new IGU (Insulated Glass Unit) from the local glass shop. They are going to want to know the width, height, overall thickness, and possibly the individual glass thickness. The best way to get the dimensions is to measure the width and height from rubber to rubber, write those numbers down. Then, remove the panel from the opening and place it on a table like we did with the single pane window. Remove the screws from opposite corners and pull of the frame. You will be able to see how far the glass goes into the surrounding rubber. If it’s 1/2″, then you want to add 1″ to the width and height that you measured previously (1/2″ times two sides= 1″). Then, measure the overall thickness of the unit by removing the rubber from the glass edge. Typically, this dimension is 1/2″, but not always. There is a metal spacer that divides the two panes of glass. Make a note of the color so you can request the same color in the new IGU. It’s either going to be silver or bronze. If you want to get the same size spacer, you need to give the glass shop the thickness of each piece of glass in the IGU. If the old unit has 1/8″ glass on both sides, and the overall thickness of the unit is 1/2″, then they will use a 1/4″ spacer. If the glass is 3/32″ on both sides, they will use a 5/16″ spacer. If you don’t care about matching the spacer thickness, you can request the thicker 1/8″ glass, and they will automatically use a 1/4″ spacer.

When you get the new IGU home, the installation is the same as the single pane window. Now, what if only one side of the IGU has been broken? Many times the outer pane will break, but the inside pane is fine. You can order a whole new IGU like we just did, or, if you’re the adventurous type, you can order only the single pane of glass that was broken and replace it. I’m going to explain how to do it, then i’m going to tell you the things that can go wrong. After you have the window pane on the table with the surrounding frame removed, you will see a black rubber type substance around the edge where the spacer is applied. This is a butyl sealant, and you have to separate the broken glass from this butyl. The best way to do it is to take a utility knife with a new blade and break through the butyl where it meets the broken glass. Then, take a new hacksaw blade, and push it into the area where you sparated the butyl from the glass. You don’t want the hacksaw blade to be attached to a hacksaw. Using your hand, saw back and forth as you work your way around the edge of the glass. This should allow you to remove the glass. Once that’s done, lay rags on top of the good piece of glass to catch any debris, and scrape the surface of the spacer that will be contacting the new glass. Use a putty knife. Then, remove the rags and debris. When you are ready to put the new glass on, clean the inside of the good piece of glass that you didn’t remove. Remember, once you install the new glass, any debris or finger marks on the inside will be permanently sealed. So, clean it real good and check it from all angles. Do the same to the side of the new glass that will be going to the inside of the IGU. Then, run a thin bead of clear silicone around the entire perimeter of the spacer. Set your new glass on the spacer and use finger pressure to adhere the glass to the silicone all the way around.Then, come in from the side, and run silicone around the side where the glass and spacer meet. Cover the window opening with something for 24 hours. You do not want to touch the IGU for 24 hours. The silicone needs to cure. After 24 hours, you can assemble the unit and install it back into the opening.

There are a couple of things that can go wrong. The first one is leaving marks on the inside portion of the glass. Once you seal the glass, you cannot clean what’s between the panes. The other thing involves condensation between the panes. If you have even the slightest break in the silicone seal around the glass, chances are you will begin to see moisture form as soon as the nights get cold and the days get warm. You are going to have to decide if you are confident enough in your ability to do the job right, or if it’s better to pay the extra money to have it done for you. Just because you pay someone to do it, doesn’t mean you still won’t encounter the same problems. The difference is, they have to guarantee their IGU for a minimum of 1 year. I have received many units over the years that had marks in between the glass. The beauty of it is the manufacturer can’t dispute it, because there’s no way anyone else could have done it except them.

OK, what if the window frames are vinyl instead of aluminum? Well, the main difference is the glass in a vinyl window no longer has the rubber gasket around the edge. You don’t remove the opposite corner screws and separate the frame from the glass. What they do is put either silicone or a two sided tape on the lip of the frame where the glass rests. That’s what holds the glass in the frame, then they apply a snap in stop on all four sides of the glass. So, you have to remove the stops first, then turn over the panel and break the seal holding the glass to the frame using a utility knife. Wear gloves during this procedure. If only one side of the IGU is broken, don’t even think about repairing just the one side. You will never get that IGU out of the frame without breaking the other piece of glass in the process. But, on the positive side, you can remove the stops without taking the panel out if it’s a slider. You can then measure the dimensions of the glass, and order the new IGU. That way you eliminate any need to temporarily cover up your window. The same is true for the stationary portion of a slider, or a picture window. Before you install the new IGU, be sure and clean the lip that had the tape or silicone, and apply either silicone or tape. Either will work.

You will discover that replacing an IGU in an aluminum frame window is a whole lot easier than a vinyl window. But, in either case, you can do it yourself and save a few bucks.
Have a Realistic Selling Price !

Have a Realistic Selling Price !   PRICING YOUR HOME RIGHT is one of the most important parts of listing your home. The biggest mistake that a seller can make when they place their home for sale on the Real Estate market is that they don’t price it right. This common mistake is often made because the seller listens to a friend or relative who professes to be an expert at selling homes instead of listening to their local professional Real Estate Agent who they should be hiring.

Your local Angus Real Estate Agent has the local knowledge and experience in the Angus market and has up to date statistics regarding prices for comparable listing and previously sold real estate. The friend or relative does not have access to the same information and is usually basing their price on perceived value that may be based on his imagined value of his own home. Not a very realistic method of ensuring your getting “fair value” for your real estate investment property.

It is always interesting to hear the argument that “with your home on a lot that size in the King City area, where I live, it would sell for ,000 more than the Real Estate Agent suggests.” Real Estate sales are based on location, style, condition and price. The location cannot be changed to the King City area, unless you own a mobile. The style of home is unchangeable unless you want to add an addition or a garage. The condition is a variable that can be changed somewhat inexpensively, with some paint, cleaning solutions and a bit of elbow grease, and possibly having a Home Stager come in for a consultation.

Your Real Estate agent can tell you accurately how you home compares to other homes in the area and what is strong and weak points are. The price of your home is the easiest option to change. The Real Estate Agent that you hire will assist you with making an informed decision as to what would be a fair market value for your home, in consideration of the current real estate market conditions. Make sure that you ask to see all of the sales that have taken place in the previous year, in the immediate neighbourhood that your home is located in. The price you place on the home should be within 3% of the expected sale price. If it is priced higher than this there will be few showings and probably no offers. If your home is on the MLS real estate listing system, it will get a lot of internet viewings by potential home buyers as well as Real Extate Agents that are dealing with these potential home buyers. If your real estate propert has more than 10 showings and no offers, your home is probably priced too high for the location, style and condition of the home. Now is the time to talk to your real estate agent about a possible price reduction. A price reduction should be in increments of ,000. If your home was originally priced at 9,900 a reduction to 3,900 is not going to create interest. Make your reduction stand out and make it 9,900, this will generate some immediate interest from bargain hunters. You may have missed the correct selling price when you first priced the home.

If your real estate property is on the market for 30 days and there are no showings, it is probably not the sales person’s fault, but is a good indication that the home is overpriced! Review your price with your local Angus Real Estate Agent and look at getting it down quickly to a more acceptable price which is inline with the value for the area. No home showings do not indicate that people don’t like your home, they most likely don’t like the asking price. If there are homes selling in your area, you need to know at what price, and what their price is based on so you can compete with them. Again you need to consult with your local Angus Real Estate Agent, he is worth his weight in gold when it comes to understanding the local market.

Getting the price right on your real estate at the very beginning the best bet for a smooth sale of your home. If the home goes on the market and you get several showings right away, and possibly an offer almost immediately, your sales representative has done a good job of pricing your home and marketing it to potential buyers that are looking for this area, style, condition and especially price. Do not think that the home is underpriced, as there are usually some buyers that are waiting for well priced homes to become available. These buyers are well educated in value for the area that they want, and they will not look at overpriced listings. There are many instances where a home is priced slightly under the market value for the area, and the interest that is generated by the price brings in several potential buyers and a bidding war is started. This is good for a seller as they may end up with a slightly elevated sale price if there are 2 or more buyers competing for the purchase.

In conclusion, don’t miss the price. A slightly overpriced home will be a lot harder to sell and most buyers are very educated as to market value for the area that the home is in. Price it right and you will be ready to move a lot quicker than those who don’t get the right price. Your buying power will be increased with the next home you are looking for, as you will not need to be conditional upon selling the one you just sold!

Beware of your real estate property becoming “stale”, after a while local real estate agents and active buyers stop looking at a house that has been on the market too long! People start thinking that the house has problems that is why it is not selling. Let your local professional Real Estate Agent put your real estate property for sale at the right price and save yourself needless worry and possible loss of value.


Bricks for Homes and Buildings

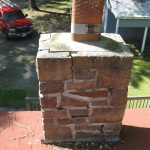
Bricks for Homes and Buildings. In the past, bricks came in many different shapes and sizes, but today’s modern bricks tend to be a standard size of around 8″ x 4″ x 2″. They demonstrate a wide variety of textures, colours and finishes from yellows, reds and purples, to smooth, rough and rustic. These are due to the mineral variations found in the clay, and the method of manufacturing.

Raw surface clay and shale materials are taken from the ground in a process that is called winning. Materials are then carefully blended to control the quality, color and consistency of the desired finished product. The material is then formed by adding water and mixing materials in a pug mill. After mixing, the pugged clay is forced through a die creating a long extruded column of clay which is then wirecut to size. The material is then carried by conveyor systems into the firing kiln where it is first predried, and then carried through the firing stage of the kiln where temperatures can reach nearly 2000 degrees Farenheit. The brick can then be cubed and stored for shipping.

Bricks for building may be made from clay, shale, soft slate, calcium silicate, concrete, or shaped from quarried stone. However, true bricks are ceramic, and therefore created by the action of heat and cooling. Clay is the most common material, with modern clay bricks formed in one of three processes – soft mud, dry press, or extruded. Bricks are used for building and pavement. In the USA, brick pavement was found incapable of withstanding heavy traffic, but it is coming back into use as a method of traffic calming or as a decorative surface in pedestrian precincts. For example, in the early 1900s, most of the streets in the city of Grand Rapids, Michigan were paved with brick. Today, there are only about 20 blocks of brick paved streets remaining.

Solid brickwork is made of two or more layers of bricks with the units running horizontally (called stretcher bricks) bound together with bricks running transverse to the wall (called “header” bricks). Each row of bricks is known as a course. The pattern of headers and stretchers employed gives rise to different bonds such as the common bond (with every sixth course composed of headers), the English bond, and the Flemish bond (with alternating stretcher and header bricks present on every course). Bonds can differ in strength and in insulating ability. Vertically staggered bonds tend to be somewhat stronger and less prone to major cracking than a non-staggered bond.

Bricklaying Terms. Before beginning any of the bricklaying projects, study the following terms and their definitions. This will help you understand the various brick positions and patterns, as well as the typical mortar joints used. Bull Header. A rowlock brick laid with its longest dimensions perpendicular to the face of the wall. Bull Stretcher. A rowlock brick laid with its longest dimension parallel to the face of the wall.

Bricks are a versatile and durable building and construction material, with good load-bearing properties, high thermal mass and potential low energy impact. In the case of simple earth bricks such as adobe and CEBs, they measure high on the sustainability index, being made from locally available (and abundant) materials of clay, sand, and water, using low technology compression equipment, solar energy or kilns. While modern methods of brick construction have a much lower sustainability index, the UK brick industry has developed a strategy to minimize its environmental impact and increase its energy efficiency and use of renewable energies. Overall, bricks are a good example of a sustainable building practice and are currently gaining in popularity around the world.

Innovation in brick and block building is moving forward – thin joint mortar allows the depth of the mortar to be reduced from l0mm to just 2mm increases the speed of construction. Thin-joint system improves thermal insulation and air tightness of construction and increases ease of installation – thin joint mortar can be laid twice as fast as traditional mortar.

Thanksgiving – The Tale of Two Holidays

TThanksgiving – The Tale of Two Holidays. he United States and Canada both celebrate Thanksgiving on different days. Thanksgiving is celebrated each year on the second Monday of October in Canada and on the fourth Thursday of November in the United States. Thanksgiving in Canada falls on the same day as Columbus Day in the United States. Most people celebrate the holiday on the weekend closest to day that Thanksgiving falls on.

Thanksgiving in North America had originated from a mix of European and Native traditions. Typically in Europe, festivals were held before and after the harvest cycles to give thanks for a good harvest, and to rejoice together after much hard work with the rest of the community.

In the United States, the modern Thanksgiving holiday tradition traces its origins to a 1621 celebration at Plymouth in present-day Massachusetts. There is also evidence for an earlier harvest celebration on the continent by Spanish explorers in Florida during 1565, as well as thanksgiving feasts in the Virginia Colony.

The French settlers in the area typically had feasts at the end of the harvest season and continued throughout the winter season, even sharing their food with the indigenous peoples of the area. Champlain had also proposed for the creation of the Order of Good Cheer in 1606. This ceremony was many years after the original started in 1578 by Frobisher.

In 1621, the Plymouth colonists and Wampanoag Indians shared an autumn harvest feast that is acknowledged today as one of the first Thanksgiving celebrations in the colonies. For more than two centuries, days of thanksgiving were celebrated by individual colonies and states. It wasn’t until 1863, in the midst of the Civil War, that President Abraham Lincoln proclaimed a national Thanksgiving Day to be held each November.

Thanksgiving in Canada did not have a fixed date until the late 19th century. Prior to Canadian confederation, many of the individual colonial governors of the Canadian provinces had declared their own days of Thanksgiving. The first official Canadian Thanksgiving occurred on April 15, 1872 when the nation was celebrating the Prince of Wales’ recovery from a serious illness.

Squanto taught the Pilgrims, weakened by malnutrition and illness, how to cultivate corn, extract sap from maple trees, catch fish in the rivers and avoid poisonous plants. He also helped the settlers forge an alliance with the Wampanoag, a local tribe, which would endure for more than 50 years and tragically remains one of the sole examples of harmony between European colonists and Native Americans.

Thanksgiving in the U.S. is based on the The Pilgrims landing at Plymouth Rock on December 11, 1620. Their first winter was devastating. At the beginning of the following fall, they had lost 46 of the original 102 who sailed on the Mayflower. But the harvest of 1621 was a bountiful one. And the remaining colonists decided to celebrate with a feast – including 91 natives who had helped the Pilgrims survive their first year. It is believed that the Pilgrims would not have made it through the year without the help of the natives. The feast was more of a traditional English harvest festival than a true “thanksgiving” observance. It lasted three days.

Your Home’s Structure

Your Home’s Structure.  In North America, modern house-construction techniques include light-frame construction (in areas with access to supplies of wood) and adobe or sometimes rammed-earth construction (in arid regions with scarce wood-resources). Some areas use brick almost exclusively, and quarried stone has long provided walling. To some extent, aluminum and steel have displaced some traditional building materials. Increasingly popular alternative construction materials include insulating concrete forms (foam forms filled with concrete), structural insulated panels (foam panels faced with oriented strand board or fiber cement), and light-gauge steel framing and heavy-gauge steel framing.

Houses may be supported by a crawl space, full or partial basement or a floating slab on grade. Basements can be constructed of wood, poured concrete or masonry blocks. Poured concrete is becoming the norm for most housing and is far superior for cost and strength.

Most common wall framing is either balloon or platform type framing. In platform framing, the joists comprise any number of individual floors or platforms that wall framing components are constructed on top of–hence, the term platform framing. Platform framing is the most common method of frame construction. The floor, or platform, is made up of joists that sit on supporting walls, beams or girders and covered with a plywood or OSB sub-floor. In the past, 1x planks set at 45 to the joists were used for the sub-floor. Balloon framing is not permitted anymore due to lack of fire-stopping between floors.

Foundation made of concrete typically will have some cracks that are visible. Most cracks are the result of settling or shrinkage of the concrete during its curing stage. Diagonal cracks that grow in width, especially ones that are wider at the bottom than at the top, indicate settlement. Diagonal cracks over windows indicate a weak header. Diagonal cracks in a poured concrete foundation that are fairly uniform in width or are hairline-type are caused by shrinkage and, though they may allow water entry, do not constitute a structural defect. Some home inspectors think that if the crack follows the mortar joint, rather than going through the brick or block, the crack isn’t a problem. This is false. Walls crack at their weakest point. If the mortar is stronger than the brick, the wall will crack through the brick

The structural support of a roof is typically provided by either stick built rafters or engineered trusses. Collar tie is a colloquial phrase that you usually won’t find in construction or engineering documentation even though the words are commonly used among builders, architects and homeowners. The correct phrase as used in textbooks and when specified is collar beam. Collar beams are usually installed in the upper third of the roof between opposing rafters.

Having your home inspected prior to purchasing is one of the most important items of the transaction. You want to protect yourself from shoddy workmanship or major problems with your homes systems. A house is comprised of many different products installed by various tradesmen and sometimes do-it-yourself type renovators. To ensure Peace of Mind in your next Real Estate transaction use the Barrie Home Inspector for your protection and Peace of Mind. If you have a wood burning appliance then contact www.wett-inspection.com for your insurance companies required WETT Certification.

Barrie Home Inspector © 2013 Frontier Theme