Seasonal Home Maintenance
Make sure air vents indoors and outdoors (intake, exhaust and forced air) are not blocked by snow or debris.
Check and clean range hood filters on a monthly basis.
Test ground fault circuit interrupter(s) on electrical outlets monthly by pushing the test button, which should then cause the reset button to pop up.
If there are young children in the house, make sure electrical outlets are equipped with safety plugs.
Regularly check the house for safety hazards, such as a loose handrail, lifting or buckling flooring, inoperative smoke detectors, and so on.
Fall
Have furnace or heating system serviced by a qualified service company every two years for a gas furnace, and every year for an oil furnace, or as recommended by the manufacturer.
If you have central air conditioning, make sure the drain pan under the cooling coil mounted in the furnace plenum is draining properly and is clean.
Lubricate circulating pump on hot water heating system.
Bleed air from hot <a href=”http://www.napoleon.cc/cottage/”target=”_blank”rel=”external”title=”Midland Cottage Inspections” >water radiators.
Disconnect the power to the furnace and examine the forced-air furnace fan belt, if installed, for wear, looseness or noise; clean fan blades of any dirt buildup.
Check chimneys for obstructions such as nests.
Vacuum electric baseboard heaters to remove dust.
Remove the grilles on forced-air systems and vacuum inside the ducts.
Turn ON gas furnace pilot light (if your furnace has one), set the thermostat to “heat” and test the furnace for proper operation by raising the thermostat setting until the furnace starts to operate. Once you have confirmed proper operation, return the thermostat to the desired setting.
Check and clean or replace furnace air filters each month during the heating season. Ventilation system, such as heat recovery ventilator, filters should be checked every two months.
Check to see that the ductwork leading to and from the heat recovery ventilator is in good shape, the joints are tightly sealed (aluminum tape or mastic) and any duct insulation and plastic duct wrap is free of tears and holes.
If the heat recovery ventilator has been shut off for the summer, clean the filters and the core, and pour water down the condensate drain to test it.
Check to see that bathroom exhaust fans and range hoods are operating properly. If possible, confirm that you are getting good airflow by observing the outside vent hood (the exterior damper should be held open by the airflow).
Check smoke, carbon monoxide and security alarms, and replace batteries.
Clean portable humidifier, if one is used.
Check sump pump and line to ensure proper operation, and to ascertain that there are no line obstructions or visible leaks.
Replace window screens with storm windows.
Remove interior insect screens from windows to allow air from the heating system to keep condensation off window glass and to allow more free solar energy into your home.
Ensure windows and skylights close tightly; repair or replace weatherstripping, as needed.
Ensure all doors to the outside shut tightly, and check other doors for ease of use. Replace door weatherstripping if required.
If there is a door between your house and the garage, check the adjustment of the self-closing device to ensure it closes the door completely.
Cover outside of air-conditioning units and shut off power.
Ensure that the ground around your home slopes away from the foundation wall, so that water does not drain into your basement.
Clean leaves from eaves troughs and roof, and test downspouts to ensure proper drainage from the roof.
Drain and store outdoor hoses. Close interior valve to outdoor hose connection and drain the hose bib (exterior faucet), unless your house has frost-proof hose bibs.
Have well water tested for quality. It is recommended that you test for bacteria every six months.
If you have a septic tank, measure the sludge and scum to determine if the tank needs to be emptied before the spring. Tanks should be pumped out at least once every three years.
Winterize landscaping, for example, store outdoor furniture, prepare gardens and, if necessary, protect young trees or bushes for winter.
Winter
Check and clean or replace furnace air filters each month during the heating season. Ventilation system, such as heat recovery ventilator, filters should be checked every two months.
After consulting your hot water tank owner’s manual, drain off a dishpan full of water from the clean-out valve at the bottom of your hot water tank to control sediment and maintain efficiency.
Clean humidifier two or three times during the winter season.
Vacuum bathroom fan grille.
Vacuum fire and smoke detectors, as dust or spider webs can prevent them from functioning.
Vacuum radiator grilles on back of refrigerators and freezers, and empty and clean drip trays.
Check pressure gauge on all fire extinguishers; recharge or replace if necessary.
Check fire escape routes, door and window locks and hardware, and lighting around outside of house; ensure family has good security habits.
Check the basement floor drain to ensure the trap contains water; refill with water if necessary.
Monitor your home for excessive moisture levels — for example, condensation on your windows, which can cause significant damage over time and pose serious health problems — and take corrective action if necessary. Mould may become an issue if you have excessive humidity in your home.
Check all faucets for signs of dripping and change washers as needed. Faucets requiring frequent replacement of washers may be in need of repair.
If you have a plumbing fixture that is not used frequently, such as a laundry tub or spare bathroom sink, tub or shower stall, run some water briefly to keep water in the trap.
Clean drains in dishwasher, sinks, bathtubs and shower stalls.
Test plumbing shut-off valves to ensure they are working and to prevent them from seizing.
Examine windows and doors for ice accumulation or cold air leaks. If found, make a note to repair or replace in the spring.
Examine attic for frost accumulation. Check roof for ice dams or icicles. If there is excessive frost or staining of the underside of the roof, or ice dams on the roof surface. Call in a qualified home inspector or roofing consultant if you suspect you have ice damming problem.
Keep snow clear of gas meters, gas appliance vents, exhaust vents and basement windows.
Monitor outdoor vents, gas meters and chimneys for ice and snow buildup. Consult with an appropriate contractor or your gas utility for information on how to safely deal with any ice problems you may discover.
Check electrical cords, plugs and outlets for all indoor and outdoor seasonal lights to ensure fire safety; if worn, or if plugs or cords feel warm to the touch, replace immediately. Do not use extension cords as permanent wiring as they are not designed for this purpose.
Spring
After consulting your hot water tank owner’s manual, carefully test the temperature and pressure relief valve to ensure it is not stuck. Caution: This test may release hot water that can cause burns.
Check and clean or replace furnace air filters each month during the heating season. Ventilation system, such as heat recovery ventilator, filters should be checked every two months. Recommend using a pleated filter with metal strips for electrostatic dust collection as the minimum type of filter to install. If using a washable filter ensure it does not restrict air for furnace which can cause early failure of fan unit.
Have fireplace or wood stove and chimney cleaned and serviced as needed.
Shut down, drain and clean furnace humidifier, and close the furnace humidifier damper on units with central air conditioning. Remove and clean filter. Empty water tray to prevent algae etc from forming.
Switch on power to air conditioning and check system. Have it serviced every two or three years.
Clean or replace air-conditioning filter, if applicable.
Check dehumidifier and drain — clean if necessary.
Turn OFF gas furnace and fireplace pilot lights where possible.
Have well water tested for quality. It is recommended that you test for bacteria every six months. Bypass any filters before performing tests.
Check smoke, carbon monoxide and security alarms, and replace batteries. Every level of homes in Ontario require a working smoke detector.
Clean windows, screens and hardware, and replace storm windows with screens. Check screens first and repair or replace if needed.
Open valve to outside hose connection after all danger of frost has passed.
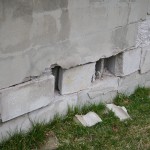
Examine the foundation walls for cracks, leaks or signs of moisture, and repair as required. Silcone caulking is ideal for minor cracks. If there are any major cracks, foam or epoxy injection may be required.
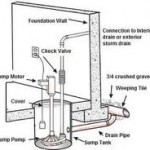
Ensure sump pump is operating properly before the spring thaw sets in. Ensure discharge pipe is connected and allows water to drain away from the foundation.
Re-level any exterior steps or decks that moved as a result of frost or settling. Ensure all steps are the same height and remove any trip hazards by re-leveling patio stones.
Check for and seal off any holes in exterior cladding that could be an entry point for small pests, such as bats and squirrels. Foam or caulking is a good filler.
Check eavestroughs and downspouts for loose joints and secure attachment to your home, clear any obstructions, and ensure water flows away from your foundation. Using splash pads can help ensure all water is drained away from homes. Most basement water problems come from improper grade or water drainage from downspouts.
Clear all drainage ditches and culverts of debris.
Repair and paint fences as necessary — allow wood fences to dry adequately before tackling this task.
Undertake spring landscape maintenance and, if necessary, fertilize young trees.
Summer
Monitor basement humidity and avoid relative humidity levels above 60 per cent. Use a dehumidifier to maintain relative humidity below 60 per cent.
Clean or replace air-conditioning filter, and clean or replace ventilation system filters if necessary. Remember most a/c technicians now recommend that you do not completely cover your unit for the winter. This traps in condensation and can actually damage unit.
Check basement pipes for condensation or dripping and, if necessary, take corrective action; for example, reduce humidity and/or insulate cold water pipes.
Check the basement floor drain to ensure the trap contains water; refill with water if necessary. Newer homes have fill line from laundry and typically condensate lines from furnace or a/c unit will ensure enough water is kept in trap.
If you have a plumbing fixture that is not used frequently, for example, a laundry tub or spare bathroom sink, tub or shower stall, run some water briefly to keep water in the trap.
Deep clean carpets and rugs.
Vacuum bathroom fan grille.
Disconnect the duct connected to your clothes dryer, and vacuum lint from duct, the areas surrounding your dryer and your dryer’s vent hood outside. Don’t forget to check and clean the outside grill and duct.
Check security of all guardrails and handrails.
Check smooth functioning of all windows, and lubricate as required. Check for damaged thermal seals which will allow moisture between panes of glass. Recommend replacing thermal unit rather than drilling holes to allow moisture out which costs up to 40% of cost of replacing window. You still end up with damaged window and can affect your resale value because any competent home inspector will note the holes drilled in glass.
Inspect window sills for any signs of cracking mortar on sills or bricks. This can allow water to enter behind brick and can do some serious damage to brick below, if not monitored brick spalling may occur.
Sand and touch up paint on windows and doors. Check all caulking.
Lubricate door hinges, and tighten screws as needed.
Check for and replace damaged caulking and weather stripping around mechanical and electrical services, windows and doorways, including the doorway between the garage and the house. Although an automatic door closure is required for your Occupancy Permit there is no “legal requirement” for you to maintain a closure.
Lubricate garage door hardware, and ensure it is operating properly. White lithium type grease is best for this project.
Lubricate automatic garage door opener motor, chain and other moving parts, and ensure that the auto-reverse mechanism is properly adjusted. Use grease or oil as recommended by manufacturer for best results. Operating instructions can usually be found online if orginal is lost or mis-placed.
Inspect electrical service lines for secure attachment where they enter your house, and make sure there is no water leakage into the house along the electrical conduit. Check for overhanging tree branches that may need to be removed. Tree branches are typically looked after by Municipality or City and a phone call is all that is required.
Check exterior wood siding and trim for signs of deterioration; clean, replace or refinish as needed. Check for any cracked or missing caulking. Re-align any siding with gaps.
Remove any plants that contact — and roots that penetrate — the siding or brick. The building code requires 8 inches of clearance from grade. Moisture will cause brick surfaces to spall if soil or snow is allowed to build up against brick surface. Treating with water proofing will help prevent this if grade cannot be changed.
From the ground, check the general condition of the roof and note any sagging that could indicate structural problems requiring further investigation from inside the attic. Note the condition of shingles for possible repair or replacement, and examine roof flashings, such as at chimney and roof joints, for any signs of cracking or leakage.
Check the chimney cap and the caulking between the cap and the chimney. Recommend having Home Inspector or Mason inspect your roof and chimney areas.
Repair driveway and walkways as needed. Sealing the crack between asphalt driveway and garage floor is a very important preventive maintenance project and will prevent driveway from sagging in future.
Repair any damaged steps. Use cement epoxy type products to ensure proper seal.
Remember an “Ounce of Prevention is Worth a Pound of Cure”
Posts Related to Seasonal Home Maintenance Schedule
-
Your Massachusetts (or Canadian) home is one of the single biggest investments you’ll ever make in your lifetime, so be sure you do all you …
-
Home Maintenance Checklist Homeowners have a duty to make sure their homes are as healthy as they can make them. This ties in to healthy …
-
Dianne Nice Globe and Mail UpdatePublished on Monday, Sep. 20, 2010 12:00AM EDTLast updated on Monday, Sep. 20, 2010 6:58AM EDT Even though it’s still …
-
First item to check is to make sure your filter is properly sized for your furnace. Ensure that the filter completely fills the holding area, …
-
It’s that time of year again. The days are getting shorter and cooler. To ensure that your house remains in prime condition over the winter, …
 Basements are typically the area of a structure most at risk for water damage because they are located below grade and surrounded by soil. Soil releases water it has absorbed during rain or when snow melts, and the water can end up in the basement through leaks or cracks.
 A sump pump is a pump placed in the basement of a home used to pump water from the basement to the outside or drain into the home’s drainage system. Sump pumps usually work in conjunction with a sump pit, which is a hole dug in the basement of a house which collects water during a rainstorm. The pump then pumps the water out of that sump pit.. A sump pump is usually necessary either in cases where the home’s basement is below the water table level, and or when the home is located in a place where flooding is common. In Ontario a sump pump is required by Ontario Building Code and must be installed unless waived by the building official.

Recent Comments