Barrie Home Inspector

Home Maintenance and Tips for Home Owners

Tag: money

Home Inspector in Barrie

Getting a the right Home Inspector in Barrie can save you a lot of money and anxiety!

While a home inspection is a visual inspection of your potential future home, a lot of items can be found and / or determined by using knowledge and experience that can only be gained by performing thousands of home inspections and having the proper training.  The Barrie Home Inspector has inspected well over 5,000 residential properties and is a Certified Building Code Official, member of Nachi, member of Nacbi, member of OBOA and is also a Certified Master Inspector.

This experience and knowledge can help find areas of water intrusion, potential mould issues,  electrical nightmares, structural deficiencies and renovations done without a building permit.   None of these issues by them selves may be “Deal Breakers”, but wouldn’t you want to know about them prior to committing to buying?

No matter what anyone tells you, when you buy a house you are the sole person Don't Buy a Money Pit
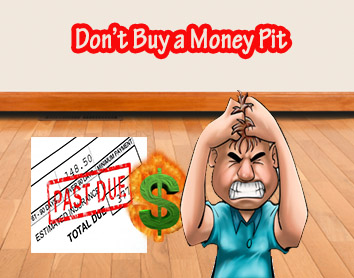
responsible for any problems once you take possession.  Try and get any money back from the sellers once the funds have transferred.   Every trip to your lawyer will cost youj money,  every letter from your lawyer will cost you money.   The lawyer and realtor will both tell you to contact your home inspector for help.  Funny how the lawyer and realtor’s fees are pretty well etched in stone, but when it comes to the home inspector,  usually where the buck stops, people seem intent on finding the cheapest price and even just using the Realtor’s referral for hiring a home inspector.   If you don’t do your homework on qualifications then shame on you,  your gambling with a huge part of your families financial net worth.

Think about what a typcial home inspection includes:

Exterior
Roof, porches, driveways, garage, drainage, retaining walls, grading, and plants or vegetation that may impact on damage to home.

Interior

Electrical and plumbing systems; foundation; heating, ventilation and air conditioning systems; water heater, septic system, electrical system, windows, doors, floors, ceilings and walls.

During the home inspection we will open accessible access hatches and cover plates, but we will not take apart any coverings or items that have been secured with screws, nails or glue.   This home still belongs to the seller and we have no right to make any obtusive holes for inspection.\

We applaud Mike Holmes and his fight against shoddy workmanship and renovations done without permits etc.  When uncovering a number of electrical, structural, plumbing or heating deficiencies, we always note the possibility that renovation work was done without a permit.

Many contractors will pick up a “fixer upper” to have some work for winter months. Lipstick on a Pig Homeowners will also do quick make over repairs and improvements to try and increase their profit.  I personally like to call these projects, “Lipstick on a Pig“,  and this is another area where only experience and knowledge can prevent you from buying a potential “Money Pit”.

The City of Barrie has hundreds and hundreds of basement renovation that were done without building permits.  This is identified from such items as steel stud walls with no approved devices used to run electrical cables.  This could electrify the entire wall system is an electrical cable shorted out.

The City of Orillia has a huge amount of building that are being used other than permissible zoning.  Some single residential homes have been converted into triplexes, and if you buy on of those properties you will ultimately become responsible for any upgrading the City may determine at a future date.

Ramara Township has some of the worst examples of building quality that I have ever seen.  One day I inspected a cottage which had the entire exterior wrapped in plastic.  The interior walls had the electrical wiring visible up high on walls.   When I located the access hatch for sump I found out why.  The entire area under floor was full of water.  The client immediately call off the inspection.   We then proceeded over to a cottage in same neighbourhood for a “quick inspection”.   The floor joists in the crawl space were all completely rotted.  Some steel beams had been inserted to carry the load.   We called it a day after that inspection.

Buying a new home,  think your protected because there was a municipal inspection, actually around 12 visits for new home building permit is normal.  Here is a list of items I have found after house has passed final inspection by municipal building departments:


  • Electrical main panel too high from grade.  Max of 69 inches to top of breaker.
  • Sump pump missing air barrier.
  • Electrical cables touching heat ducts.
  • Missing or low insulation in attic
  • Missing Water and Ice shield, usually only on upper roof.  $400 dollar saving for roofers.  Most inspectors will not climb ladders.
  • Exterior penetrations not sealed.  Plumbing, vents, windows.
  • Gaps in garage fume barrier.
  • Hinges on exterior of doors.  Security issue as pins can be lifted.
  • Defects in concrete finishes, porches and garage floors.

An Educated Consumer is a Smart Consumer –  Take some time to understand who Be an Educated Consumeryou are hiring and if they are the right person for you to be trusting with your investment.


Energy Conservation in your Home

Energy Conservation in your Home. Turning your home into an energy efficient house not only helps the environment but also saves you up to forty percent in your energy consumption charges. This is in comparison to the average home in North America.

Keep your furnace clean, lubricated and properly adjusted with annual maintenance. If your furnace is working at peak efficiency it will use less energy and cost less to operate. Clean or replace the filter every 1-2 months – a dirty filter reduces the airflow and forces the furnace to run longer to heat your home. Set back your thermostat when nobody is home and at night when everyone is sleeping for added savings. Heating your home constitutes your largest energy expenditure. Even a little conservation of heating fuel goes a long way toward achieving a lower utility bill. Dialing down the thermostat one degree during the winter can result in about 1 to 3 percent less fuel use, and a similar reduction in your heating bill.

When doing laundry use cold water and save from 85 to 90 percent of the energy you would normally use. Front loading machines use less water and energy, up to fifty percent. Also wash full loads to ensure you are fully utilizing energy being consumed.

You can make a lot of progress toward improving the energy efficiency in your home by simply plugging the many places through which air can get in or get out. Plugging your home is called “air sealing,” and it is one of the most important first steps to take when weatherizing your house to increase its energy efficiency.our windows and doors allow a lot of energy to escape which is costing you money. Ensure all your window frames, door frames and sills are caulked using a silicone based sealant. Make sure your heat registers are not being blocked by furniture.

Your water heater is the next largest home energy load after heating and cooling. To reduce water heating energy use ensure your water heater’s thermostat is set to 120F . Improvements such as installing low-flow faucets and shower heads, and insulating hot water pipes will also help you save money on water heating. When replacing your hot water heater consider buying an Energy Star model to ensure greater efficiency.

Air conditioners typically have a life expectancy of twenty years. Even after your unit is 10 years old you can save up to 40 percent of your efficiency by replacing your older model with newer air conditioner with a minimum SEER rating of 15.

Learn about Barrie Home Inspection Information. Stop by The Barrie Home Inspector’s site where you can find out all about the Barrie Home Inspection Services you will need.

Home Improvement in Barrie

Home Improvement in Barrie –  Your guide to home improvements in the Local area.

How To Add Those Special Finishing Touches For Little Or No Money

Home is, as they say, where the heart is, so it is hardly surprising that we want it to look its best. We want our homes to reflect our tastes and design ideas and for it to be a welcoming, attractive place for ourselves and our guests to enjoy.

In these times of financial pressures and focus towards austerity, many families don’t have any spare funds to put towards little extras for their home. So how can we still add those special finishing touches to our homes while spending little or no money?  Here are some suggestions.

Looking  good

If a room is looking tired and in need of decorating, you can often freshen it up by attending to the details, rather than the whole room. Try painting or varnishing the skirting boards, picture rails, door frames and windowsills to brighten things up. Sometimes, changing lampshades or cushions can have the effect of a makeover too.

Storage is a tricky subject and it can be hard in smaller houses to keep things neat and tidy. Invest in shelving that can be added to or reduced in size so that you can keep up with the state of your belongings. If children’s toys are a problem, try putting some of them away for a while, then bringing them out at a later date. Result? You will have fewer toys to store and your kids will be delighted to be reunited with old favourites once more.

Sweet smell of success

Pot pourri, incense sticks and other proprietary room fragrances can be expensive and their scents can be overpowering. Why not try wiping your favourite essential oil over the glass part of a light bulb or leaving some on a radiator in a shallow dish? When the light or radiator is switched on, the heat will diffuse the fragrance into the room.

Place some water and slices of lemon in your microwave for a few minutes. Not only will it help loosen any stuck on food for cleaning it later, the citrus smells will also turn your kitchen into an aromatic heaven.

Make do and mend

If your table is looking a bit worse for wear, there’s no need to fork out for a new one straight away. A coat of paint, varnish or wood stain will refresh it in no time. Or, if you don’t want to do that, adding a simple table runner (these can be stitched from spare fabric) will really brighten it up.

You could even add a vase of flowers too for an instant touch of spring. Place a small lump of charcoal in the water to keep it pure and fresh for longer.

If you are handy with a sewing machine, you could have a go at making your own curtains. This will work out cheaper than purchasing off-the-peg ones, and you can customize them perfectly to match the themes in your room and the size of your windows. Sew a few marbles or small weights into the hems of unlined curtain to make them hang nicely. You could even try embroidering a design onto them to make them truly unique and personal.

Real Estate Market in Innisfil

Real Estate Market in Innisfil.  Today’s market for buying and selling homes if very competitive and you will want to ensure you have picked the best possible real estate agent to represent you. Here are some tips we have gleaned from some professionals.

Does your professional Realtor provide a staging service for his or her listings, many do in this competitive market. What information did your agent bring to your home prior to listing? How many agents are in his office, how many listings does he currently have? There are many people who are doing “on the job training” make your agent isn’t one of them.

How is your Realtor intending to market your home. What type of ads and how many open houses will they be having. It is always better to have an understanding on how the process will take place prior to listing, then there is no confusion.

When listing your home ensure you are using the current market conditions and not a two year old appraisal that does not reflect the current market prices. Mortgages rates are low and vacancy rates are declining which is good news for investors and sellers of properties.

Many people try and save money by utilizing the same Realtor and will even use a Home Inspector recommended by the Realtor. This saving can have dire consequences when you don’t have someone whose only duty is too look after your interests. Pay for the services of a professional and they will ensure your interests come first and foremost.

When buying a “used” home or property it is very important to ensure all work was done by qualified trades persons and all permits were taken out. Patio’s and decks are often erected illegally without using the proper building techniques or materials. You could end up paying to remove structure and erecting a new one if your local building authority inspects your property.

Buying or Selling a Home in Innisfil

Buying or Selling a Home in Innisfil. There are a lot of emotions involved when buying or selling a home, but negotiating the price shouldn’t be.  Having a plan prior to negotiating is key to preventing stress during the turbulence involved in high-stakes negotiations.  Your Innisfil Real Estate Agent can guide you and advise you but eventually you must make the final decision.

First time home buyers get a lot of tips from friends, family and co-workers, much of which is probably good advice gleaned from their own home buying experiences.  Your Professional Innisfil Realtor has bought and sold hundreds of homes and is more prepared to advise you on many obstacles that may arise and often do.  The more you know, the better equipped you are to negotiate.

Plan your attack.  Determine what features you want and what they are worth to you. Know in advance the most you’re willing to pay, and with your agent work back from that number to determine your initial offer, which can set the tone for the entire negotiation. A too-low bid may offend sellers emotionally invested in the sales price; a too-high bid may lead you to spend more than necessary to close the sale.

When selling your home you want to present the best possible view of  your home.  Most Professional Innisfil Real Estate agents will help you in this area using their years of experience to guide you.  From making minor repairs to plumbing, electrical, caulking, sidewalks and painting, what your prospective buyer first sees when initially walking through your home is what is most likely the deciding factor in whether to entertain an offer.  Some Realtors will suggest you have your home Professionally staged to improve your homes presentation.

Most upscale homes now use professional staging companies to fully stage the property.  These professional companies supply furniture and accessories to enable prospective clients to see the home in the best light possible and so they can envision themselves living there.  Some Home Staging companies advertise that many of their homes will actually sell for more than the listing price.

People who earn a good salary but fail to qualify for a typical mortgage are frequently turning to the Rent to Own option, Rent to Own has become very popular in the Innisfil Real Estate market. A rent to own transaction is when a landlord agrees to lease a home to a tenant and the tenant has an option to buy the home for a pre-negotiated price before the end of the lease. The primary components of a rent to own transaction are the rental term, the purchase price, the upfront deposit, and the monthly rent credit.

When deciding to start looking for a new home, the first step you should take is getting yourself pre-approved by your financial institution of choice. When seeking preapproval, talk to a few different mortgage lenders to find the best mortgage package that suits your needs. Two or three lenders is usually enough to give you a reasonable idea of the amount of money to can afford to spend on a new home.

Your local Innisfil Real Estate Agent can share his knowledge and expertise to allow you to get more money from the sale or to save you money when buying your next property.  Utilize their tools and expertise and help ensure your next real estate transaction is a pleasurable experience with the knowledge that you got the best price possible whether buying or selling.

Orillia Real Estate Agents Optimization

Orillia Real Estate Agents Optimization –  Google is constantly changing what it uses to rank websites.

SEO or Search Engines Optimization is a very important part of improving visibility to Search Engines.  The higher a site is ranked typically results in more visitors which equates to more money for commercial sites.  Searches can include image search, video search, news search or any specific text search.

The acronym “SEOs” can refer to “search engine optimizers,” a term adopted by an industry of consultants who carry out optimization projects on behalf of clients, and by employees who perform SEO services in-house.

Webmasters started realizing that adding keywords to site and their meta tags was increasing their visibility to search engines. Inaccurate, incomplete, and inconsistent data in meta tags could and did cause pages to rank for irrelevant searches. Web content providers also manipulated a number of attributes within the HTML source of a page in an attempt to rank well in search engines.

Webmasters who provide the content to fill the search results do not necessarily profit adequately for providing the content which allows search engines to deliver a ton of ads. Some of these same webmasters sell text links to other high margin or profitable sites. This is of course arbitrarily wrong because search engines want to be the middle man and want to profit from as many internet ad dollars as possible.

Black Hat SEO is tempting because your site can jump up in rankings quickly and the Black Practices actually do work, temporarily. They do end up getting sites higher search rankings; that is, until these same sites get banned for using unethical practices. It’s just not worth the risk. Use efficient search engine optimization techniques to get your site ranked higher, and stay away from anything that even looks like Black Hat SEO. Here’s a few articles that can get you on the road to knowing search engine optimization.

The Google Sandbox Effect is a theory used to explain why newly-registered domains or domains with frequent ownership changes rank poorly in Google Search Engine Results Pages (SERPS). In other words new websites are put into a “sandbox” or a holding area and have their search ratings on hold until they can prove worthy of ranking.

Google appears not to have a Sandbox anymore if they ever did have one.  This articles author created www.orilliarealestateagents.info and within one week the site was on Google’s first page when seaching for Orillia Real Estate Agents.  This quick rise in ranking would seem to disprove the Sand Box affect claimed by many SEO consultants

Avoid Water Leaks on New Window Installations

Avoid Water Leaks on New Window Installations. Avoiding leaks when installing vinyl retrofit windows is simple with a little expertise and common sense.

These days a lot of homeowners are replacing their old windows with vinyl windows using the retrofit style of window frame. This is particularly true in the west, and specifically, in California. The number one argument that I have heard against using the retrofit method, is that it is susceptible to water leaks. Well, that’s true if you don’t do it properly. But, if you do a complete tear out of your old window down to the studs, you’re going to have water leak issues there as well if you don’t install the new window properly. So I think that argument is, well, all wet. So, let me tell you the best way to install your retrofit windows that will ensure that water cannot get in.

There is an old song that goes, “It never rains in California, but girl don’t they warn ya, it pours, man it pours”. For those of you in California, you know how true this is. While California doesn’t get a lot of annual rainfall, when it does rain, it can come down in buckets due to the close proximity to the ocean. So, you want to be sure that your windows are well sealed. If you are installing retrofit frames against a stucco house, you want to put a thick bead of sealant right on the outside face of the old window frame, all the way around. Latex caulk should work fine, but if you want to spend a little more to get the best sealant available, use 100% silicone. Depending on the number of windows you will be doing, this extra cost can add up. You pay approximately for a tube of acrylic latex caulk, and or more for a tube of 100% silicone. You are going to use 1-3 tubes per window, depending on the size. So you can see how it could add up. Here is a trick that I used to do to save a little money; The most vulnerable part of your installation is the top of the window, because gravity will have the water running down from the roof to the ground. It’s not likely that water is going to find it’s way through the sides or bottom. So, I used to carry two caulking guns, and load one with the silicone, and the other with the acrylic caulk. I would run the silicone accross the top of the old frame, and caulk the sides and bottom. Then, put your new window into the opening and have a helper hold it firmly in place while you plumb and level it, then screw it into place. After you have the window completely installed, your final step should be to caulk where the retrofit lip meets the stucco. Here again, I used to use white silicone on the top, and caulk on the sides and bottom. You now have a double barrier against water infiltration. After about a week, check the sealant around each window for signs of cracking. Because stucco is usually uneven, there could have been gaps that were larger in some areas than in others. If you don’t force the caulk into the gap to completely fill it, the caulk can sag before drying, causing a crack to form. Simply recaulk over any cracks that you see. You can check the silicone on top as well, but because silicone dries like a rubber substance, you shouldn’t see any cracks there.

OK, what if the replacement windows are going between wood trim surrounding the opening? If you are using the retrofit lip, and trimming it to fit between the wood, then you still apply the heavy bead to the old frame before installing the window. But, instead of sealing where the retrofit lip meets the stucco, you seal where it meets the wood. Then, you want to be sure to seal above the window, where the top piece of wood meets the stucco. Again, use silicone up there. Now, no water can run down the stucco wall and get under the top piece of wood. Sometimes, though, you might decide not to use a retrofit style frame between the wood, choosing a block replacement frame instead. If you choose to do it this way, you have to add trim to the outside. You still want to apply the sealant to the old frame, then apply your trim so it contacts the new window as well as the sealant on the old frame.

If you follow these procedures, you won’t have to worry about any water penetrating into your home, I don’t care how hard it pours!

DUAL PANE WINDOW GLASS REPAIR

DUAL PANE WINDOW GLASS REPAIR. For the past few weeks, I have been explaining how to repair a broken window pane in your home. But, what if you have dual pane windows? Is the process the same? Well, pretty much, except for a couple of variations. So, let’s review the single pane repair process, and I will point out the differences regarding dual pane windows.

When we start talking about dual pane windows, one of the first things that comes to mind is vinyl window frames instead of aluminum. When dealing with dual pane windows, you can have either aluminum or vinyl frames, depending on the year the house was built. Dual pane glass got popular in the 1980′s, but vinyl frames didn’t really catch on until the 1990′s. So, if your house is less than 10 years old, chances are you have vinyl framed windows. In either case, I will discuss the differences. Let’s say you have a sliding aluminum frame window with dual pane glass. The procedure for removing the frame from the opening and the glass from the sash is the same as with the single pane windows. The differences are, first, the glass goes into the frame about twice as far as the single pane window. The single pane window glass went 1/4″ into the surrounding rubber. The dual pane usually goes 1/2″ into the rubber. So, if both pieces of glass have been broken, you are going to have to order a new IGU (Insulated Glass Unit) from the local glass shop. They are going to want to know the width, height, overall thickness, and possibly the individual glass thickness. The best way to get the dimensions is to measure the width and height from rubber to rubber, write those numbers down. Then, remove the panel from the opening and place it on a table like we did with the single pane window. Remove the screws from opposite corners and pull of the frame. You will be able to see how far the glass goes into the surrounding rubber. If it’s 1/2″, then you want to add 1″ to the width and height that you measured previously (1/2″ times two sides= 1″). Then, measure the overall thickness of the unit by removing the rubber from the glass edge. Typically, this dimension is 1/2″, but not always. There is a metal spacer that divides the two panes of glass. Make a note of the color so you can request the same color in the new IGU. It’s either going to be silver or bronze. If you want to get the same size spacer, you need to give the glass shop the thickness of each piece of glass in the IGU. If the old unit has 1/8″ glass on both sides, and the overall thickness of the unit is 1/2″, then they will use a 1/4″ spacer. If the glass is 3/32″ on both sides, they will use a 5/16″ spacer. If you don’t care about matching the spacer thickness, you can request the thicker 1/8″ glass, and they will automatically use a 1/4″ spacer.

When you get the new IGU home, the installation is the same as the single pane window. Now, what if only one side of the IGU has been broken? Many times the outer pane will break, but the inside pane is fine. You can order a whole new IGU like we just did, or, if you’re the adventurous type, you can order only the single pane of glass that was broken and replace it. I’m going to explain how to do it, then i’m going to tell you the things that can go wrong. After you have the window pane on the table with the surrounding frame removed, you will see a black rubber type substance around the edge where the spacer is applied. This is a butyl sealant, and you have to separate the broken glass from this butyl. The best way to do it is to take a utility knife with a new blade and break through the butyl where it meets the broken glass. Then, take a new hacksaw blade, and push it into the area where you sparated the butyl from the glass. You don’t want the hacksaw blade to be attached to a hacksaw. Using your hand, saw back and forth as you work your way around the edge of the glass. This should allow you to remove the glass. Once that’s done, lay rags on top of the good piece of glass to catch any debris, and scrape the surface of the spacer that will be contacting the new glass. Use a putty knife. Then, remove the rags and debris. When you are ready to put the new glass on, clean the inside of the good piece of glass that you didn’t remove. Remember, once you install the new glass, any debris or finger marks on the inside will be permanently sealed. So, clean it real good and check it from all angles. Do the same to the side of the new glass that will be going to the inside of the IGU. Then, run a thin bead of clear silicone around the entire perimeter of the spacer. Set your new glass on the spacer and use finger pressure to adhere the glass to the silicone all the way around.Then, come in from the side, and run silicone around the side where the glass and spacer meet. Cover the window opening with something for 24 hours. You do not want to touch the IGU for 24 hours. The silicone needs to cure. After 24 hours, you can assemble the unit and install it back into the opening.

There are a couple of things that can go wrong. The first one is leaving marks on the inside portion of the glass. Once you seal the glass, you cannot clean what’s between the panes. The other thing involves condensation between the panes. If you have even the slightest break in the silicone seal around the glass, chances are you will begin to see moisture form as soon as the nights get cold and the days get warm. You are going to have to decide if you are confident enough in your ability to do the job right, or if it’s better to pay the extra money to have it done for you. Just because you pay someone to do it, doesn’t mean you still won’t encounter the same problems. The difference is, they have to guarantee their IGU for a minimum of 1 year. I have received many units over the years that had marks in between the glass. The beauty of it is the manufacturer can’t dispute it, because there’s no way anyone else could have done it except them.

OK, what if the window frames are vinyl instead of aluminum? Well, the main difference is the glass in a vinyl window no longer has the rubber gasket around the edge. You don’t remove the opposite corner screws and separate the frame from the glass. What they do is put either silicone or a two sided tape on the lip of the frame where the glass rests. That’s what holds the glass in the frame, then they apply a snap in stop on all four sides of the glass. So, you have to remove the stops first, then turn over the panel and break the seal holding the glass to the frame using a utility knife. Wear gloves during this procedure. If only one side of the IGU is broken, don’t even think about repairing just the one side. You will never get that IGU out of the frame without breaking the other piece of glass in the process. But, on the positive side, you can remove the stops without taking the panel out if it’s a slider. You can then measure the dimensions of the glass, and order the new IGU. That way you eliminate any need to temporarily cover up your window. The same is true for the stationary portion of a slider, or a picture window. Before you install the new IGU, be sure and clean the lip that had the tape or silicone, and apply either silicone or tape. Either will work.

You will discover that replacing an IGU in an aluminum frame window is a whole lot easier than a vinyl window. But, in either case, you can do it yourself and save a few bucks.

Reversed Polarity – Home Inspection Findings

Reversed Polarity – Home Inspection Findings.   Electrical Reversed Polarity Issues:

Everything works just fine, however my home inspector informed me that some of my electrical outlets have reversed polarity and should be rewired. Why is polarity an issue?

Polarity can be confusing. Within 120-volt household circuits, if the polarity is correct, the black wire is the hot wire and the white wire is neutral wire (grounded conductor). If the polarity is reversed the white wire is hot and the black wire becomes the neutral.

Some appliances have only two prongs and no ground (U-shaped) prong. Polarized appliances have a wide (neutral) blade and a narrow (hot) blade. This configuration fits with (grounded) receptacles with the same configuration. Problems occur when do-it-yourself homeowners forget that the brass screws on an outlet are for hot (black) wires and the silver screws are for the white(neutral) wires and the green screw is for the (ground) green wire

Polarity Matters:

With some appliances polarity doesn’t matter as with a clock for example. However with a lamp socket the electricity is intended to flow from the button on the bottom of the light bulb ( black hot wire) through the filament and back through the threaded collar (white neutral wire) to the neutral at the distribution panel box. If there is no bulb in the socket and the switch is on there is a greater chance of touching the threaded portion of the socket (or bulb) than the button on the bottom. If the polarity is reversed this threaded portion becomes the hot (live) side of the circuit and there is greater risk of electrical shock.

Polarity matters with appliances that have switches. When the appliance is plugged in the power should only go as far as the switch. If the polarity is reversed the power goes through the entire appliance and then back to the switch. If a loose wire in the appliance comes in contact with the outside case, the entire appliance becomes potentially “hot” electrically speaking and the risk of shock exists even though the appliance is not turned on.

For safety sake:

To keep yourself and family safe, if your home inspector indicates a reversed polarity situation have a qualified electrician check the wiring and make sure that this issue is resolved.

Small landlords feeling squeezed out of rental market

Small landlords feeling squeezed out of rental market

March 4, 2011
Jennifer Brown
SPECIAL TO THE STAR

If you ask April Stewart whether she’d recommend the life of a small landlord, she’d probably try and discourage you, at least in Ontario.

A former property owner herself and a paralegal based in <a href=”http://www.barriehomeinspector.com”target=”_blank”rel=”external”title=”Barrie Home Inspector” >Barrie, who represents landlords trying to evict bad tenants, Stewart is also a member of the Ontario Landlords Association, a group representing small landlords who says they are feeling the pinch thanks to landlord/tenant laws that favour tenants.

“When I see someone, usually the problem has gotten pretty out of hand,” she says. “We’re actually encouraging people who are thinking about becoming landlords to spend their money in another province; it’s too scary here,” says Stewart. “I tell folks who call me and say they’re thinking about becoming a landlord that unless you can afford to carry that house and that tenant for a minimum of six months without it affecting your finances at all, do not do it. “

Stewart and other members of the OLA recently met with MPP Mike Colle and senior members of the Ministry of Housing to present their concerns. Primarily, they say, the current Residential Tenancies Act and Landlord and Tenant Board are prejudiced against landlords and favour tenants’ rights.

The OLA, which is a province-wide educational and networking group for landlords with six or less units, presented Colle and the ministry representatives with a top 10 list of issues of most concern to small landlords on Feb. 17.

“We shared with the Ministry of Housing the items that came from some polling we did on the Ontario Landlords Association website ( www.ontariolandlord.ca). Where do they feel they are getting burned?” she says. “One glaring example is that it’s for a tenant to take a landlord to court but it’s 0 for a landlord to take a tenant to court. Why? The prejudice is right at the counter when you’re filing. There’s a built-in assumption that landlords have all the money and tenants have none.”

Other issues include the OLA’s request for a return to damage deposits, a firm no pets clause in leases, the ability for landlords to search a prospective tenant’s history at the Landlord Tenant Board and the fact prior evictions are not admissible in current eviction proceedings. The OLA has also asked for the nine regional Landlord Tenant Board offices that closed in 2008 be re-opened.

The OLA’s website demonstrates the frustration of small landlords — it’s help forum has had over 40,000 posts in 18 months.

“I think the government and the ministry need to understand that we’re not interested in taking rights away from anybody; we just want some equity in this legislation and before the board. If there are this many stories, and if I’m this busy in my practice, it suggests there is a problem here and landlords aren’t getting a fair shake,” she says.

An area the OLA is studying is the number of evictions and failure to pay related to tenants receiving assistance from Ontario Works and Ontario Disability Support Program.

“I went through my 2010 eviction cases and separated what were tenants on support and 8,000 of rent arrears were with landlords who will never recover that money because they were folks on assistance who you can’t collect from them,” says Stewart.

Stewart, who is a single mother and a renter herself, says small landlords can’t afford to go through the appeal process with tenants who default on their rent. The process can often drag on in court for six to eight months, even longer.

“The small landlords can’t afford this happening to them. By the time they get through the eviction process and pay for someone to help them and not have the rent come in, it’s not a financially viable system. A landlord with fewer than 10 units can’t afford it and emotionally they can’t afford it,” says Stewart.

Small landlords represent about 40 per cent of the affordable <a href=”http://www.commercialbuildinginspector.ca”target=”_blank”rel=”external”title=”Commercial Building Inspector” >rental housing stock in Ontario. But that is starting to diminish, says Stewart, as property owners find it increasingly difficult to find good tenants. As someone who represents landlords when they’re having a problem evicting a tenant, she admits she sees the worst. The economy has also played a role in changing the landscape for property owners, she notes.

“I was a landlord in the 1990s in Barrie when the vacancy rate was next to nothing, but things have changed. The economy has changed, interest rates have driven good tenants, who have their financial act together, into home ownership. We’re often left with a less than savory pool of tenants to choose from,” she says.

Stewart says the OLA was “unofficially invited back” to speak to the Ministry of Housing in six months. At the same time, tenant groups are pushing for the province to provide greater rights to tenants over issues regarding repairs to buildings and the problem of bed bugs. But the OLA says the current laws in Ontario were created to protect tenants from large corporate landlords running huge buildings, not small business people renting a few units with few resources behind them.

Barrie Home Inspector © 2013 Frontier Theme