Barrie Home Inspector

Home Maintenance and Tips for Home Owners

Tag: windows

Home Security

Keeping Your Home Safe: How To Put Burglars Off Trying To Break In

Our homes are our castles – havens against the outside world, expressions of our tastes and design choices and a place for our loved ones to live together in, hopefully, domestic bliss. So when someone threatens it, it can be extremely frightening and upsetting. There are many ways to try to stop burglars, however. Here are some ideas to consider.

Make your home harder to break into

Burglars like to be able to get in and out quickly and discretely, so anything you can do to prevent this will help. Make sure any outdoor sheds and other buildings that contain ladders, tools etc are firmly locked. No point in providing thieves with the wherewithal to get into your house. Never leave spare keys hidden outside. People who do that tend to unwittingly choose some pretty obvious places to stow them. Instead, give the spare to a trusted neighbour.

Consider switching to a gravel driveway, or have areas of gravel under your windows. Gravel makes a lovely, loud crunching sound when trodden on. Grow thorny, or spiky plants against the walls too – good options for this are roses, firethorn or juniper.

Make your home looked loved

Keep the garden neat so the house doesn’t look neglected. Mow the lawn regularly – get someone to do it for you if you are away for a long time. Weed borders; sweep up fallen leaves and empty trash cans. Make sure the house exterior is well maintained. Burglars might assume a house in disrepair is owned by someone physically unable to look after it – and therefore less able to defend it.

Don’t let the mail build up in your absence either. Ask a friend to go in to collect it for you, or arrange for it to be temporarily redirected. Keep larger items like bicycles or lawnmowers out of sight too and place curtains over garage, basement or shed windows to prevent anyone looking in.

Make your home look occupied

It stands to reason that most thieves will think twice about targeting a house that looks like it is occupied. Draw the curtains and leave some lights on (or on an automatic timer switch)  when you go out at night, or perhaps leave the radio or TV playing.

Lock all doors when you are going out or to bed, and check all windows are closed. Never leave notes on the door saying ‘Gone Shopping’. Finally, create a written inventory of your valuable possessions and their estimated value or insured amounts – photographs and purchase receipts will also prove useful in the event of a break-in.

Make your house and home security something to invest in

The range of home security equipment out there is mind-blowing, from strong locks to state-of-the-art alarm systems. Ideas to enhance security include switching to more secure window locks, replacing door locks with deadbolts, making sure door hinges are on the inside and installing a decent burglar alarm– some will link to your local police station.

Such an investment is worth doing properly – after all, it will go a long way to protect your assets, not to mention your peace of mind. If, however, you are concerned about how to pay for such measures, take some time to consider how you will raise the money to fund them. A financial advisor or broker can steer you towards a number of financing methods, such as reasonable loan arrangements with manageable repayment rates. If you own your own home, there are many excellent remortgage deals on the market – most mortgage advisors would be especially pleased to see the additional funds released spent on raising the security of the property and its contents. If all else fails, perhaps you could take on some extra work to raise the funds. This temporary sacrifice of your time will result in long-term security and happiness in your home: who could ask for more?


Buying Older or Century Homes

Buying Older or Century Homes.  When buying an older home you are usually buying a home with built in character which has withstood the test of time and is still in habitable condition.  There are some inherent problems that you might encounter when purchasing an older home.  I have listed a few basic ones just for consideration.

Rock and Cement FoundationYour older homes foundation is probably constructed of cement and stone.  There would have been no waterproofing done to the exterior of the foundation and there will be no weeping tile draining into sump.  This inspection area is one of the most important and expensive to repair if faulty.
Knob and tube wiring was usually installed in all older homes and there is usually still porcelain insulators present even if it was all removed.  You have to have a home inspector or electrician check to ensure all the knob and tube wiring was replaced.  The knob and tube was usually replaced with older two wire which has no ground and unless a total rehab was done on building you will still find two wire at outlets on upper floors and other hard to access areas.

Asbestos and vermiculite can be found in many older homes.  Some older homes had hot water boilers with cast iron radiators.  This systems were typically insulated with asbestos insulation.  Vermiculite insulation may contain asbestos and was frequently added to attics in older homes.  Asbestos requires professional removal which is very expensive.

Lead plumbing pipes and galvanized plumbing lines can be very expensive to replace and were used on most older homes.  Most insurance companies in Ontario will not insure a home with galvanized plumbing pipes.  Galvanized pipes tend to corrode from the inside out so that there is no warning that a pipe is about to burst.

Older homes may have many layers of lead paint which has built up over the years.  Lead-based paint is a major source of lead poisoning for children and can also affect adults. In children, lead poisoning can cause irreversible brain damage and can impair mental functioning. It can retard mental and physical development and reduce attention span. It can also retard fetal development even at extremely low levels of lead.  Thus, young children, fetuses, infants, and adults with high blood pressure are the most vulnerable to the effects of lead.

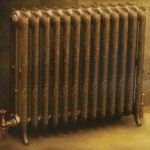
Cast Iron RadiatorsYour house is old and gorgeous, as are those wonderfully ornate cast-iron radiators, but these days, energy prices are anything but old-fashioned. Older homes have radiators sized for a time when open-window ventilation was popular and insulation was uncommon. If you’ve insulated and updated your windows, your radiators are most likely larger than they need to be.  You should have your home assessed by a heating expert to evaluate the expense and available options if required to upgrade your heating system.  Many people are using GEOthermal heat pump systems when they are in the country and have no real alternative fuel source.  Oil and propane are available for people who have no access to natural gas but can be very expensive,  especially in older homes that may be lacking in  insulation and thermal protection.

Many older homes with boilers also had asbestos insulation on both the boiler and the piping.  Even boilers which may have fiberglass insulation on pipes may still have asbestos on elbow joints.  Ensure your potential home is asbestos free prior to purchasing.  Depending on the amount of asbestos in the home the cost of removal can be disastrous to your renovation budget.


The Barrie Home Inspector has many years of experience in inspecting Century Homes and is also a Certified Building Code Official with the Ontario Building Officials Association.  Commercial Building inspections also entail the same problems as residential and buyers have to be aware of the risks and hazards involved in purchasing older properties.  Visit the Barrie Home Inspector’s site a www.barriehomeinspector.com to obtain more information and advice when dealing with older homes.

Buying Older Home – Typical Problems

Buying Older Home – Typical Problems.  When buying an older home you are usually buying a home with built in character which has withstood the test of time and is still in habitable condition.  There are some inherent problems that you might encounter when purchasing an older home.  I have listed a few basic ones just for consideration.

Your older homes foundation is probably constructed of cement and stone.  There would have been no waterproofing done to the exterior of the foundation and there will be no weeping tile draining into sump.  This inspection area is one of the most important and expensive to repair if faulty.

Knob and tube wiring was usually installed in all older homes and there is usually still porcelain insulators present even if it was all removed.  You have to have a home inspector or electrician check to ensure all the knob and tube wiring was replaced.  The knob and tube was usually replaced with older two wire which has no ground and unless a total rehab was done on building you will still find two wire at outlets on upper floors and other hard to access areas.

Asbestos and vermiculite can be found in many older homes.  Some older homes had hot water boilers with cast iron radiators.  This systems were typically insulated with asbestos insulation.  Vermiculite insulation may contain asbestos and was frequently added to attics in older homes.  Asbestos requires professional removal which is very expensive.

Lead plumbing pipes and galvanized plumbing lines can be very expensive to replace and were used on most older homes.  Most insurance companies in Ontario will not insure a home with galvanized plumbing pipes.  Galvanized pipes tend to corrode from the inside out so that there is no warning that a pipe is about to burst.

Older homes may have many layers of lead paint which has built up over the years.  Lead-based paint is a major source of lead poisoning for children and can also affect adults. In children, lead poisoning can cause irreversible brain damage and can impair mental functioning. It can retard mental and physical development and reduce attention span. It can also retard fetal development even at extremely low levels of lead.  Thus, young children, fetuses, infants, and adults with high blood pressure are the most vulnerable to the effects of lead.

Your house is old and gorgeous, as are those wonderfully ornate cast-iron radiators, but these days, energy prices are anything but old-fashioned. Older homes have radiators sized for a time when open-window ventilation was popular and insulation was uncommon. If you’ve insulated and updated your windows, your radiators are most likely larger than they need to be.  You should have your home assessed by a heating expert to evaluate the expense and available options if required to upgrade your heating system.

The Barrie Home Inspector has many years of experience in inspecting Century Homes and is also a Certified Building Code Official with the Ontario Building Officials Association.  Commercial Building inspections also entail the same problems as residential and buyers have to be aware of the risks and hazards involved in purchasing older properties.  Visit the Barrie Home Inspector’s site at www.barriehomeinspector.com to obtain more information and advice when dealing with older homes.

Avoid Water Leaks on New Window Installations

Avoid Water Leaks on New Window Installations. Avoiding leaks when installing vinyl retrofit windows is simple with a little expertise and common sense.

These days a lot of homeowners are replacing their old windows with vinyl windows using the retrofit style of window frame. This is particularly true in the west, and specifically, in California. The number one argument that I have heard against using the retrofit method, is that it is susceptible to water leaks. Well, that’s true if you don’t do it properly. But, if you do a complete tear out of your old window down to the studs, you’re going to have water leak issues there as well if you don’t install the new window properly. So I think that argument is, well, all wet. So, let me tell you the best way to install your retrofit windows that will ensure that water cannot get in.

There is an old song that goes, “It never rains in California, but girl don’t they warn ya, it pours, man it pours”. For those of you in California, you know how true this is. While California doesn’t get a lot of annual rainfall, when it does rain, it can come down in buckets due to the close proximity to the ocean. So, you want to be sure that your windows are well sealed. If you are installing retrofit frames against a stucco house, you want to put a thick bead of sealant right on the outside face of the old window frame, all the way around. Latex caulk should work fine, but if you want to spend a little more to get the best sealant available, use 100% silicone. Depending on the number of windows you will be doing, this extra cost can add up. You pay approximately for a tube of acrylic latex caulk, and or more for a tube of 100% silicone. You are going to use 1-3 tubes per window, depending on the size. So you can see how it could add up. Here is a trick that I used to do to save a little money; The most vulnerable part of your installation is the top of the window, because gravity will have the water running down from the roof to the ground. It’s not likely that water is going to find it’s way through the sides or bottom. So, I used to carry two caulking guns, and load one with the silicone, and the other with the acrylic caulk. I would run the silicone accross the top of the old frame, and caulk the sides and bottom. Then, put your new window into the opening and have a helper hold it firmly in place while you plumb and level it, then screw it into place. After you have the window completely installed, your final step should be to caulk where the retrofit lip meets the stucco. Here again, I used to use white silicone on the top, and caulk on the sides and bottom. You now have a double barrier against water infiltration. After about a week, check the sealant around each window for signs of cracking. Because stucco is usually uneven, there could have been gaps that were larger in some areas than in others. If you don’t force the caulk into the gap to completely fill it, the caulk can sag before drying, causing a crack to form. Simply recaulk over any cracks that you see. You can check the silicone on top as well, but because silicone dries like a rubber substance, you shouldn’t see any cracks there.

OK, what if the replacement windows are going between wood trim surrounding the opening? If you are using the retrofit lip, and trimming it to fit between the wood, then you still apply the heavy bead to the old frame before installing the window. But, instead of sealing where the retrofit lip meets the stucco, you seal where it meets the wood. Then, you want to be sure to seal above the window, where the top piece of wood meets the stucco. Again, use silicone up there. Now, no water can run down the stucco wall and get under the top piece of wood. Sometimes, though, you might decide not to use a retrofit style frame between the wood, choosing a block replacement frame instead. If you choose to do it this way, you have to add trim to the outside. You still want to apply the sealant to the old frame, then apply your trim so it contacts the new window as well as the sealant on the old frame.

If you follow these procedures, you won’t have to worry about any water penetrating into your home, I don’t care how hard it pours!

DUAL PANE WINDOW GLASS REPAIR

DUAL PANE WINDOW GLASS REPAIR. For the past few weeks, I have been explaining how to repair a broken window pane in your home. But, what if you have dual pane windows? Is the process the same? Well, pretty much, except for a couple of variations. So, let’s review the single pane repair process, and I will point out the differences regarding dual pane windows.

When we start talking about dual pane windows, one of the first things that comes to mind is vinyl window frames instead of aluminum. When dealing with dual pane windows, you can have either aluminum or vinyl frames, depending on the year the house was built. Dual pane glass got popular in the 1980′s, but vinyl frames didn’t really catch on until the 1990′s. So, if your house is less than 10 years old, chances are you have vinyl framed windows. In either case, I will discuss the differences. Let’s say you have a sliding aluminum frame window with dual pane glass. The procedure for removing the frame from the opening and the glass from the sash is the same as with the single pane windows. The differences are, first, the glass goes into the frame about twice as far as the single pane window. The single pane window glass went 1/4″ into the surrounding rubber. The dual pane usually goes 1/2″ into the rubber. So, if both pieces of glass have been broken, you are going to have to order a new IGU (Insulated Glass Unit) from the local glass shop. They are going to want to know the width, height, overall thickness, and possibly the individual glass thickness. The best way to get the dimensions is to measure the width and height from rubber to rubber, write those numbers down. Then, remove the panel from the opening and place it on a table like we did with the single pane window. Remove the screws from opposite corners and pull of the frame. You will be able to see how far the glass goes into the surrounding rubber. If it’s 1/2″, then you want to add 1″ to the width and height that you measured previously (1/2″ times two sides= 1″). Then, measure the overall thickness of the unit by removing the rubber from the glass edge. Typically, this dimension is 1/2″, but not always. There is a metal spacer that divides the two panes of glass. Make a note of the color so you can request the same color in the new IGU. It’s either going to be silver or bronze. If you want to get the same size spacer, you need to give the glass shop the thickness of each piece of glass in the IGU. If the old unit has 1/8″ glass on both sides, and the overall thickness of the unit is 1/2″, then they will use a 1/4″ spacer. If the glass is 3/32″ on both sides, they will use a 5/16″ spacer. If you don’t care about matching the spacer thickness, you can request the thicker 1/8″ glass, and they will automatically use a 1/4″ spacer.

When you get the new IGU home, the installation is the same as the single pane window. Now, what if only one side of the IGU has been broken? Many times the outer pane will break, but the inside pane is fine. You can order a whole new IGU like we just did, or, if you’re the adventurous type, you can order only the single pane of glass that was broken and replace it. I’m going to explain how to do it, then i’m going to tell you the things that can go wrong. After you have the window pane on the table with the surrounding frame removed, you will see a black rubber type substance around the edge where the spacer is applied. This is a butyl sealant, and you have to separate the broken glass from this butyl. The best way to do it is to take a utility knife with a new blade and break through the butyl where it meets the broken glass. Then, take a new hacksaw blade, and push it into the area where you sparated the butyl from the glass. You don’t want the hacksaw blade to be attached to a hacksaw. Using your hand, saw back and forth as you work your way around the edge of the glass. This should allow you to remove the glass. Once that’s done, lay rags on top of the good piece of glass to catch any debris, and scrape the surface of the spacer that will be contacting the new glass. Use a putty knife. Then, remove the rags and debris. When you are ready to put the new glass on, clean the inside of the good piece of glass that you didn’t remove. Remember, once you install the new glass, any debris or finger marks on the inside will be permanently sealed. So, clean it real good and check it from all angles. Do the same to the side of the new glass that will be going to the inside of the IGU. Then, run a thin bead of clear silicone around the entire perimeter of the spacer. Set your new glass on the spacer and use finger pressure to adhere the glass to the silicone all the way around.Then, come in from the side, and run silicone around the side where the glass and spacer meet. Cover the window opening with something for 24 hours. You do not want to touch the IGU for 24 hours. The silicone needs to cure. After 24 hours, you can assemble the unit and install it back into the opening.

There are a couple of things that can go wrong. The first one is leaving marks on the inside portion of the glass. Once you seal the glass, you cannot clean what’s between the panes. The other thing involves condensation between the panes. If you have even the slightest break in the silicone seal around the glass, chances are you will begin to see moisture form as soon as the nights get cold and the days get warm. You are going to have to decide if you are confident enough in your ability to do the job right, or if it’s better to pay the extra money to have it done for you. Just because you pay someone to do it, doesn’t mean you still won’t encounter the same problems. The difference is, they have to guarantee their IGU for a minimum of 1 year. I have received many units over the years that had marks in between the glass. The beauty of it is the manufacturer can’t dispute it, because there’s no way anyone else could have done it except them.

OK, what if the window frames are vinyl instead of aluminum? Well, the main difference is the glass in a vinyl window no longer has the rubber gasket around the edge. You don’t remove the opposite corner screws and separate the frame from the glass. What they do is put either silicone or a two sided tape on the lip of the frame where the glass rests. That’s what holds the glass in the frame, then they apply a snap in stop on all four sides of the glass. So, you have to remove the stops first, then turn over the panel and break the seal holding the glass to the frame using a utility knife. Wear gloves during this procedure. If only one side of the IGU is broken, don’t even think about repairing just the one side. You will never get that IGU out of the frame without breaking the other piece of glass in the process. But, on the positive side, you can remove the stops without taking the panel out if it’s a slider. You can then measure the dimensions of the glass, and order the new IGU. That way you eliminate any need to temporarily cover up your window. The same is true for the stationary portion of a slider, or a picture window. Before you install the new IGU, be sure and clean the lip that had the tape or silicone, and apply either silicone or tape. Either will work.

You will discover that replacing an IGU in an aluminum frame window is a whole lot easier than a vinyl window. But, in either case, you can do it yourself and save a few bucks.

Your Home’s Structure

Your Home’s Structure.  In North America, modern house-construction techniques include light-frame construction (in areas with access to supplies of wood) and adobe or sometimes rammed-earth construction (in arid regions with scarce wood-resources). Some areas use brick almost exclusively, and quarried stone has long provided walling. To some extent, aluminum and steel have displaced some traditional building materials. Increasingly popular alternative construction materials include insulating concrete forms (foam forms filled with concrete), structural insulated panels (foam panels faced with oriented strand board or fiber cement), and light-gauge steel framing and heavy-gauge steel framing.

Houses may be supported by a crawl space, full or partial basement or a floating slab on grade. Basements can be constructed of wood, poured concrete or masonry blocks. Poured concrete is becoming the norm for most housing and is far superior for cost and strength.

Most common wall framing is either balloon or platform type framing. In platform framing, the joists comprise any number of individual floors or platforms that wall framing components are constructed on top of–hence, the term platform framing. Platform framing is the most common method of frame construction. The floor, or platform, is made up of joists that sit on supporting walls, beams or girders and covered with a plywood or OSB sub-floor. In the past, 1x planks set at 45 to the joists were used for the sub-floor. Balloon framing is not permitted anymore due to lack of fire-stopping between floors.

Foundation made of concrete typically will have some cracks that are visible. Most cracks are the result of settling or shrinkage of the concrete during its curing stage. Diagonal cracks that grow in width, especially ones that are wider at the bottom than at the top, indicate settlement. Diagonal cracks over windows indicate a weak header. Diagonal cracks in a poured concrete foundation that are fairly uniform in width or are hairline-type are caused by shrinkage and, though they may allow water entry, do not constitute a structural defect. Some home inspectors think that if the crack follows the mortar joint, rather than going through the brick or block, the crack isn’t a problem. This is false. Walls crack at their weakest point. If the mortar is stronger than the brick, the wall will crack through the brick

The structural support of a roof is typically provided by either stick built rafters or engineered trusses. Collar tie is a colloquial phrase that you usually won’t find in construction or engineering documentation even though the words are commonly used among builders, architects and homeowners. The correct phrase as used in textbooks and when specified is collar beam. Collar beams are usually installed in the upper third of the roof between opposing rafters.

Having your home inspected prior to purchasing is one of the most important items of the transaction. You want to protect yourself from shoddy workmanship or major problems with your homes systems. A house is comprised of many different products installed by various tradesmen and sometimes do-it-yourself type renovators. To ensure Peace of Mind in your next Real Estate transaction use the Barrie Home Inspector for your protection and Peace of Mind. If you have a wood burning appliance then contact www.wett-inspection.com for your insurance companies required WETT Certification.

Inspecting Your Homes Attic

Inspecting Your Homes Attic.  There should be an access opening to all attic spaces that exceed 30 square feet and have a vertical height of 30 inches or more. The rough-framed opening should be at least 22 inches by 30 inches. It should be located in a hallway or other readily accessible location. An attic access that is located in a clothes closet is often inaccessible due to permanent shelving installed. There should be headroom that is a minimum of 30 inches above the attic access. In some places “attic” is used more specifically to apply to lofts which have boarded floors and ceilings, and usually windows or skylights, and then “loft” is kept to mean a dark, unboarded roof-space which lacks these features.

Knee walls are vertical walls with an attic space directly behind them. You’ll typically find them in houses with finished attic spaces and dormer windows, as with 1-story houses. There are a couple of ways that you may see a knee wall insulated. The most important areas and most overlooked areas to insulate are the open joist ends below the knee wall. Air sealing reduces heat flow from air movement, or convection. Air sealing prevents water vapor in the air from entering the wall assembly. In a 100-square-foot wall, 1 cup of water can diffuse through drywall without a vapor diffusion retarder in a single year. Fifty cups can enter through a -inch round hole. Air sealing is 10 to 100 times as important as installing a vapor diffusion retarder.

Insulation performance is measured by R-value – its ability to resist heat flow. Higher R-values mean more insulating power. Different R-values are recommended for walls, attics, basements and crawlspaces, depending on your area of the country. Insulation works best when air is not moving through or around it. So it is very important to seal air leaks before installing insulation to ensure that you get the best performance from the insulation.

If you hear noises in your attic and you are unsure as to the source, it’s relatively easy to determine if it’s squirrels – squirrels are active during the daytime. Thus, if you hear scampering and scurrying noises during the day, it’s likely squirrels. Other attic-dwelling critters, such as rats and mice, bats, flying squirrels, opossums, and raccoons, are nocturnal, so they mostly only make noise at night. Flying squirrels are also nocturnal. If the noises happen at night, there’s a strong chance of mice or rats.

The squirrel often finds bedding material by shredding roof or wall paper, and shredding vent ducts and insulation around pipes. The biggest problem is that they chew, and I’ve seen dozens of cases in which they’ve chewed electrical wires. It’s estimated that half of house fires of unknown origin are due to rodent chewing on electrical wires.

Most people will have no reaction at all when exposed to molds. Allergic reactions, similar to common pollen or animal allergies, are the most common health effects for individuals sensitive to molds. Flu-like symptoms and skin rash may occur. Molds may also aggravate asthma. Fungal infections from building-associated molds may occur in people with serious immune disease but this is very rare. Most symptoms are temporary and eliminated by correcting the mold problem in the home.

When your home is inspected by a Professional Home Inspector they are checking for proper ventilation, presence of moisture, proper insulation, mould, proper structural support and signs of rodent or animal entry. Bat feces or vermiculite insulation removal can run into ten thousand dollars or more for removal. Compared to the cost of hiring the Barrie Home Inspector for $200.00 this is a really cost effective way to protect yourself and ensure Peace of Mind on your next Real Estate purchase.


Barrie Home Inspector © 2013 Frontier Theme